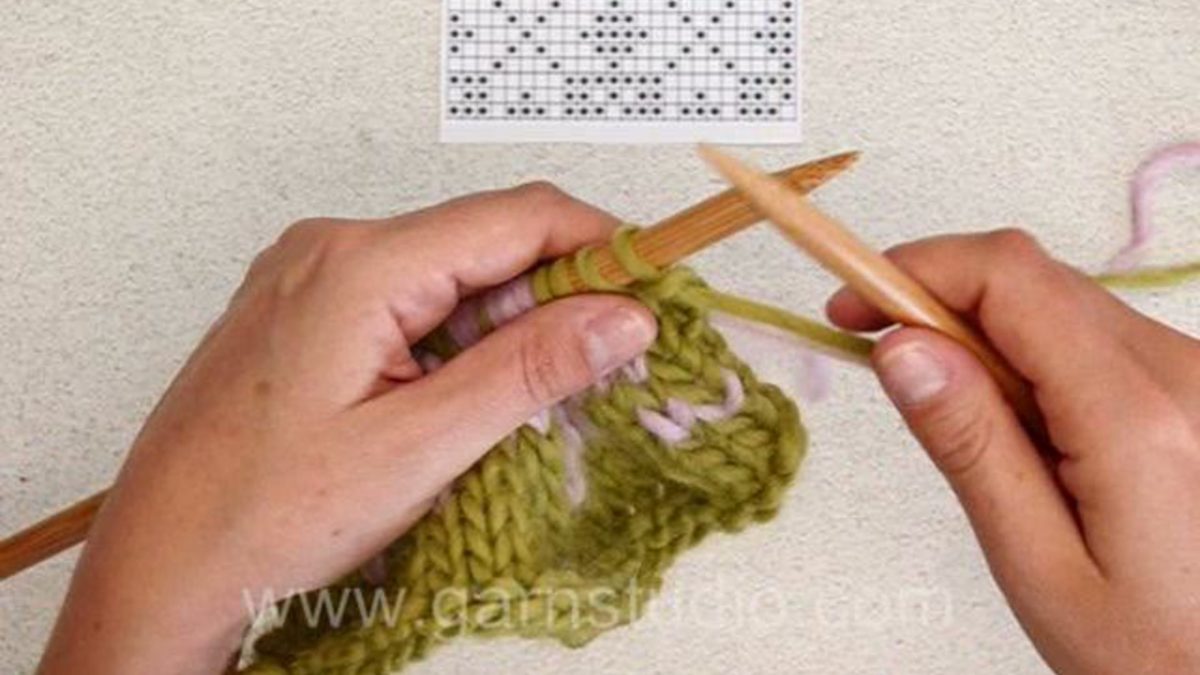
In this DROPS video we show how you can knit Fair Isle (2 colour knitting) using the US/UK method.
In this video we are following a chart back and forth on needles, knitting with two colors. The color that not is knitted is following behind the work when knitting RS rows. Make sure it’s not too tight or too loose. If more than 3 sts in a row of one of the colors, then twist the yarns for every 3 sts.
When working WS rows have the yarn following in front of work, again make sure you have the right tension on the thread. Note – if a color not is used all the way at the end of the row, you can drop it, but if it will be used at the beginning of the next row, then keep carry it a long by twisting around the working yarn. Don’t worry if it’s a bit uneven, it will even out a lot when blocking.
You can find this video in many more languages, as well as search within all DROPS knitting and crochet videos here: http://www.garnstudio.com/video.php?lang=en
Find thousands of free knitting and crochet patterns here: www.garnstudio.com
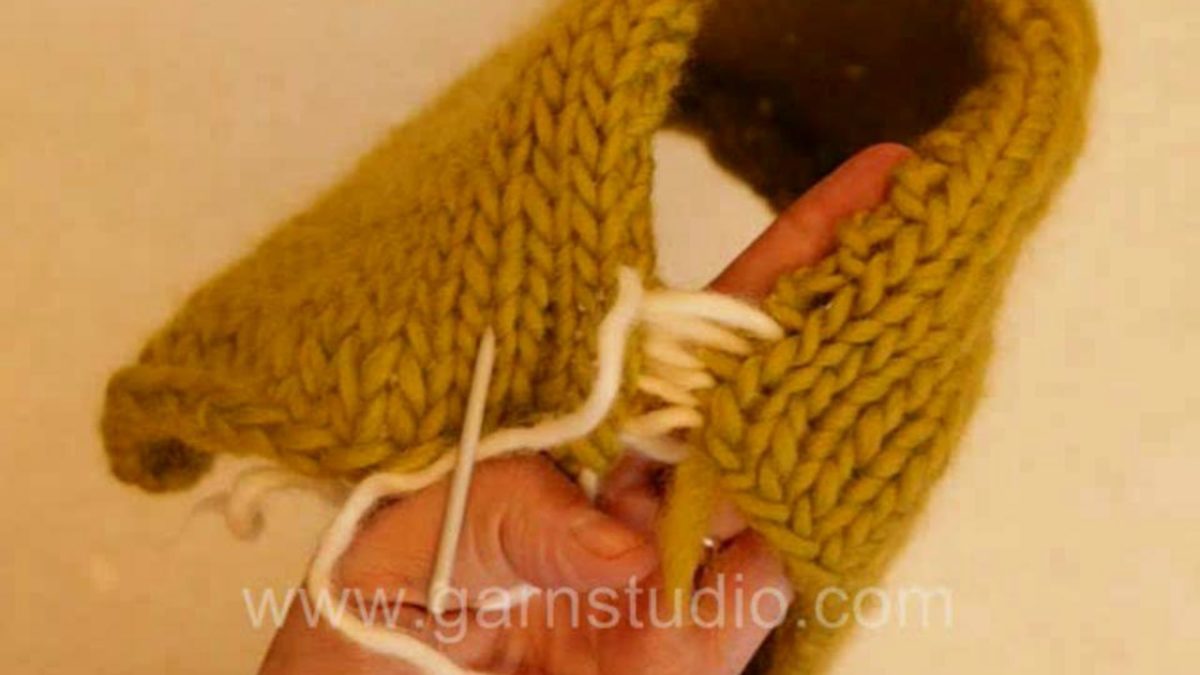
In this DROPS video we show how to sew mattress stitches.
This is a common way of seaming together side-to-side pieces – like side seams on sweaters. In the video we use a contrasting color yarn so it’s easy to see what we are doing. If the tail from casting on is long enough use it to seam. Mattress stitching is done in the space between the edge stitch and the stitch next to it.
Lay the pieces side by side with the right side facing you.
Pull the edge stitch slightly away from the stitch next to it so that you can see the bar between the edge st and the next st. Insert your yarn needle under the bar. Pull the yarn through the bar and then insert the needle under the bar on the other piece. Work back and forth, inserting the needle under the bar on one piece then the other piece. As you go along you can pull the yarn in the direction of the seam and the pieces will be joined with an invisible seam.
You can find this video in many more languages, as well as search within all DROPS knitting and crochet videos here: http://www.garnstudio.com/video.php?lang=en
Find thousands of free knitting and crochet patterns here: www.garnstudio.com
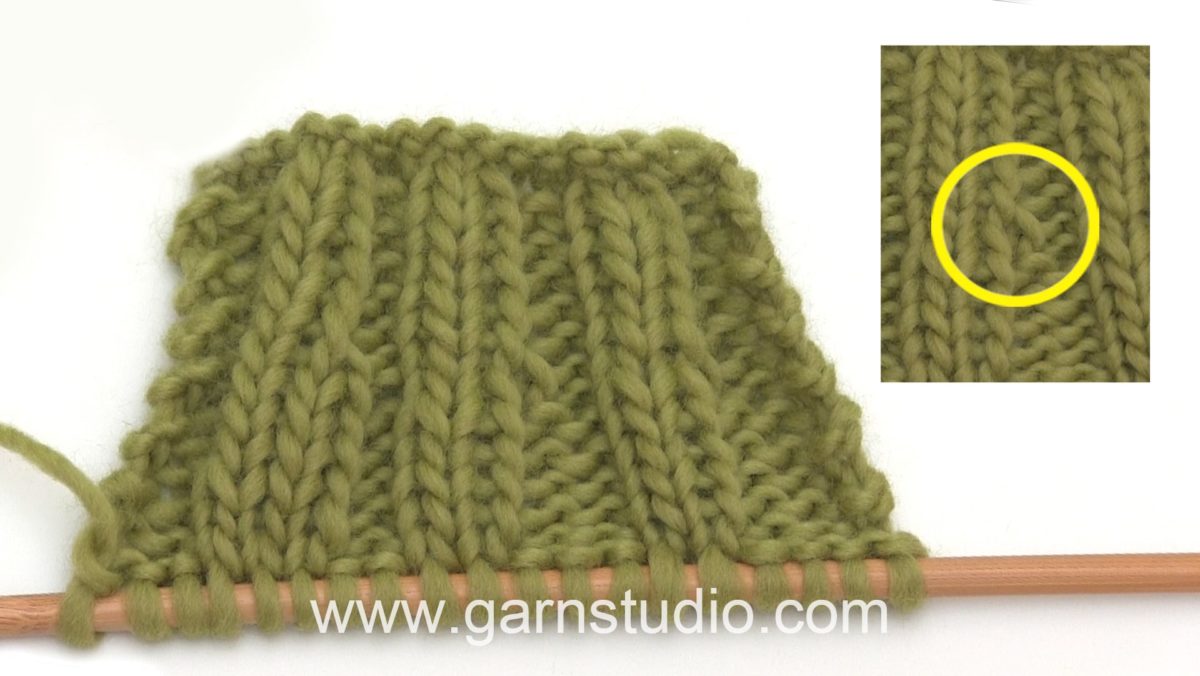
In this DROPS video we show how you can increase in purl stitches.
This video is showing a K2 P2 rib where the P2 increases to P3.From RS pick up the yarn between K1 P1. Purl this stitch twisted, i.e. purl in the back loop of the stitch.
You can find this video in many more languages, as well as search within all DROPS knitting and crochet videos here: http://www.garnstudio.com/video.php?lang=en
Find thousands of free knitting and crochet patterns here: www.garnstudio.com
With its imposing mountains, endless plateaus and echoing valleys, Norway is a country where nature takes the lead. Using time-lapse, this film attempts to capture the ebb and flow of the seasons and is a result of one year of planning, a second year of shooting and four months of editing.
20,000 kilometers have been travelled, 200,000 photos taken and 20 terabytes worth of hard drives filled. Months have been spent hiking through the mountains, sleeping in tents and travelling through the entire country hunting for the best locations.
SEASONS of NORWAY is shot and edited by Morten Rustad. The video is available in up to 8K resolution (7680*4320 letterboxed).
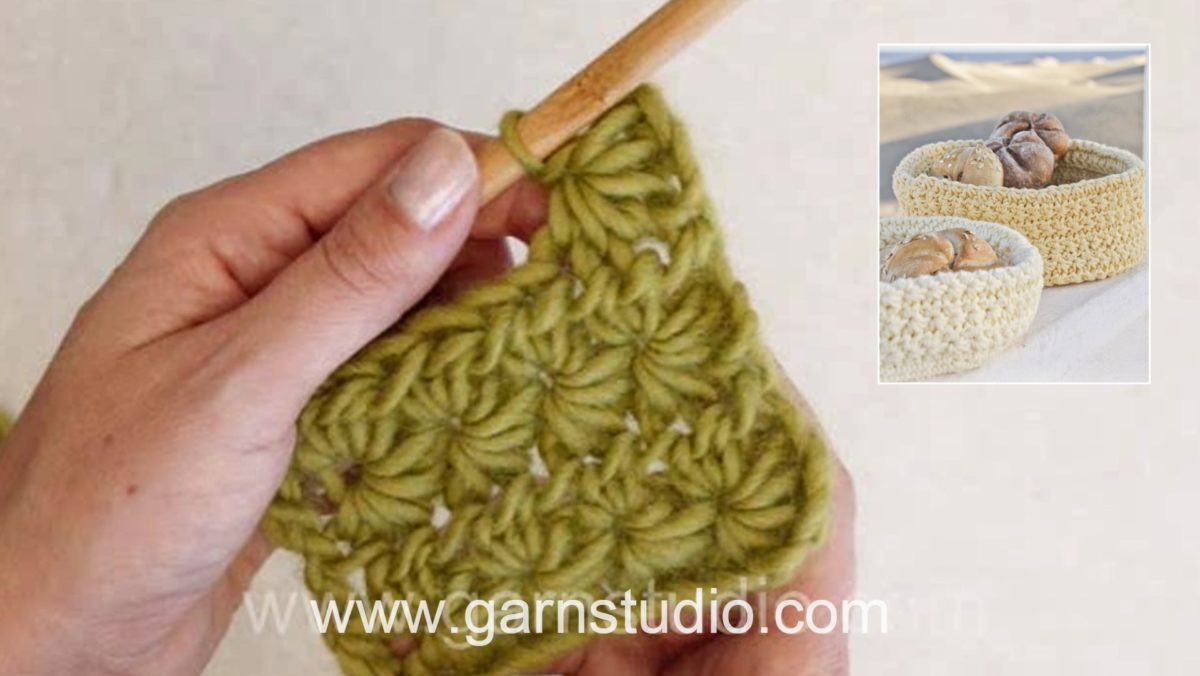
In this DROPS video we show how to crochet a star stitch pattern back and forth.
You start by crocheting an uneven number of chain sts.
You need a minimum of 7 ch for 1 star, 9 ch makes 2 stars, 11 ch makes 3 stars and so on. On our sample we ch 13 for 4 stars.
Row 1 (RS): pick up 5 sts starting in 2nd ch from hook = 6 sts on hook, make a yo and pull through all 6 sts, ch 1 which creates a hole on top of the 6 sts, *pick up 1 st in the hole, 1 st in the side of the last st of 6 sts, 1 st in the same ch as the last st of 6 sts was picked up in, 1 st in each of next 2 chain = 6 sts on hook, make a yo and pull through all 6 sts, ch 1*, repeat *-*. Make 1 htr in last ch.
Row 2 (WS): ch 2, work 2 htr in “each star hole”, end row with 1 htr in last st.
Row 3: ch 3, pick up 1 st in 2nd and 3rd chain from hook, 1 st in first 3 sts on row = 6 sts on hook, make a yo and pull through all 6 sts, ch 1, *pick up 1 st in the hole, 1 st in the side of the last st of 6 sts, 1 st in the same st as the last st of 6 sts was picked up in, 1 st in each of next 2 sts = 6 sts on hook, make a yo and pull through all 6 sts, ch 1*, repeat *-*. Make 1 htr in last ch.
Repeat row 2 and 3 for star pattern.
You can find this video in many more languages, as well as search within all DROPS knitting and crochet videos here: http://www.garnstudio.com/video.php?lang=en
Find thousands of free knitting and crochet patterns here: www.garnstudio.com
These tips will help you to make a template for your newly uploaded YouTube videos. If you want to be more productive while uploading new videos to YouTube, watch this video!
If you want to be more productive and also to have more engaging videos on your channel, you need to ramp up the descriptions of your videos you upload to YouTube!
In this YouTube description tutorial, I will show you some useful YouTube tips, especially for beginners, on how to set the video description template and how to optimize YouTube descriptions. Learn some YouTube description tips and tricks right away!
YouTube offers a great feature to set default descriptions to uploaded videos, which will be filled in automatically to newly uploaded videos, which can be modified afterwards.
First of all, you’re just going to log in to YouTube, come down to your creator studio, go to channel, and then upload defaults. And this is where you set everything you want to be a part of every single video that you upload. If you have some default text you always want to be added to every video, you can do this using the method shown in this video. I hope this helps!
🤔 ABOUT CODEREVOLUTION TV 😃
Hello, I’m Szabi, a 32 years old guy living with my wife and our beautiful 4 year old daughter Maya. I started my journey in WordPress plugin development back in 2017, when I quit my programmer job and became a full time stay at home WordPress plugin developer, entrepreneur, blogger and also daddy. Since then, I implemented over 100 WordPress plugins, earning my full time income from them.
I started this YouTube channel to share tutorials for my plugins with people who are using them, however, since then, the channel has evolved into a daily VLOG, besides of tutorials for my plugins, I am sharing here also my insights about how to be a successful entrepreneur in our current times.
I really enjoy finding problems and solving them using creative and easy to use solutions to make life easier, this will reflect also in this YouTube channel!
On this YouTube channel, you will see a new video published each day at 7 PM GMT! If you don’t want to miss my videos, subscribe and hit the bell notification also!
Check out my website and blog for news and tutorials on how to earn a passive income from the internet and how to build your online business ► https://coderevolution.ro/
▶ GEAR I USE IN MY VIDEOS 👇
Microphone: Samson Go Mic (Great quality, Budget price): https://amzn.to/2GvwCjW
▬▬▬▬▬▬▬▬▬▬▬▬▬▬▬▬
To your success,
Szabi – CodeRevolution.
DISCLAIMER: The information contained on this YouTube Channel and the resources available for download/viewing through this YouTube Channel are for educational and informational purposes only.
This description may contain affiliate links. If you purchase a product through one of them, I will receive a commission (at no additional cost to you). I only ever endorse products that I have personally used and benefited from personally. Thank you for your support!
In this DROPS video we show how you can bind off your work from the wrong side.
On the wrong side you bind off the same way as from the right side, but the stitches are purled before they are passed over each other. When 1 stitch remains, cut the thread, and pull yarn through last stitch.
You can find this video in many more languages, as well as search within all DROPS knitting and crochet videos here: http://www.garnstudio.com/video.php?lang=en
Find thousands of free knitting and crochet patterns here: www.garnstudio.com
Video overviews reflect current feature functionality in Canvas; they are updated based on workflow changes, not on minor or non-functional interface enhancements. Depending on your institution’s Canvas theme, the Canvas interface may display differently than shown in this video, but the functionality is the same.