This tutorial explains how to add Bloggers Badge on WordPress powered blog site. Happy Blogging!
Check out these cool WordPress plugins! – CodeRevolution.
Category: WordPress
-
How to add Bloggers Badge on WordPress powered blog
-
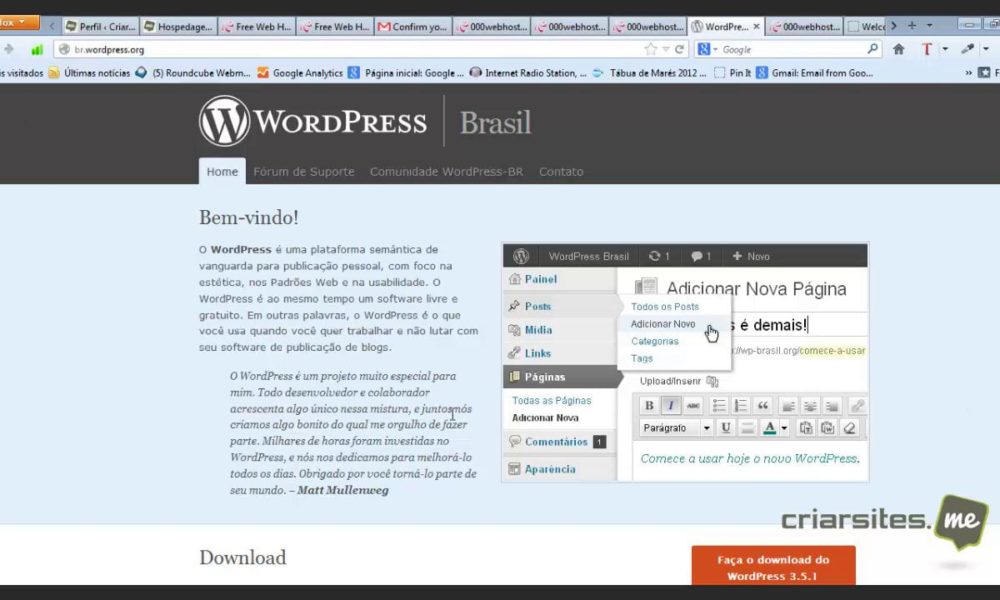
Aprenda criar uma conta de hospedagem grátis e fazer a instalação do WordPress.
Neste video tutorial ensino passo a passo como criar sua conta de hospedagem gratuita e fazer as configurações necessãrias para instalar o WordPress.Veja o link do artigo http://www.criarsites.me/hospedagem-gratis-para-criar-sites-wordpress/
Tutorial http://www.criarsites.me
Check out these cool WordPress plugins! – CodeRevolution. -
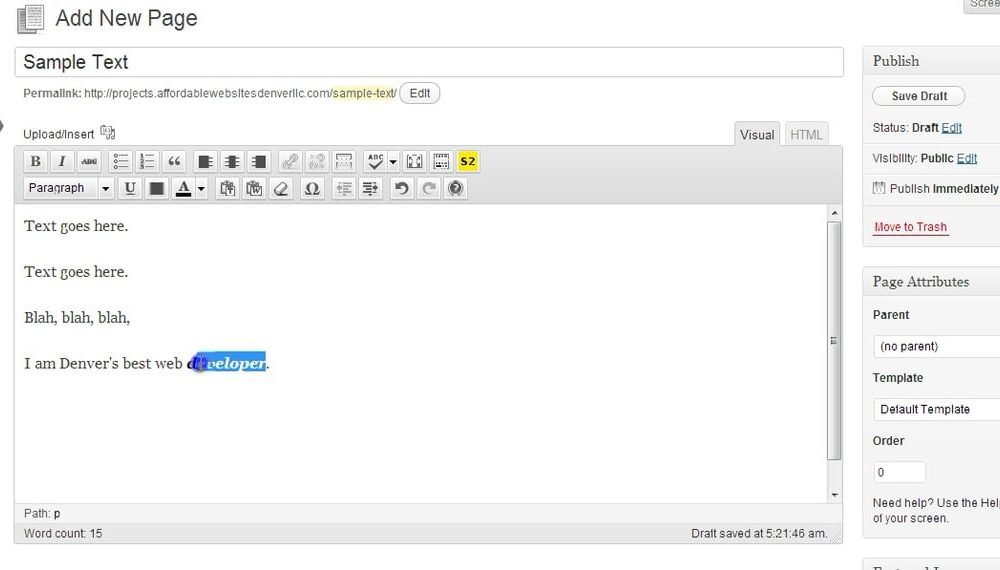
Denver WordPress Tutorials How t Add & Change Links
In this video we show you how to add and change links in the body of a WordPress website page or blog post.
Check out these cool WordPress plugins! – CodeRevolution. -
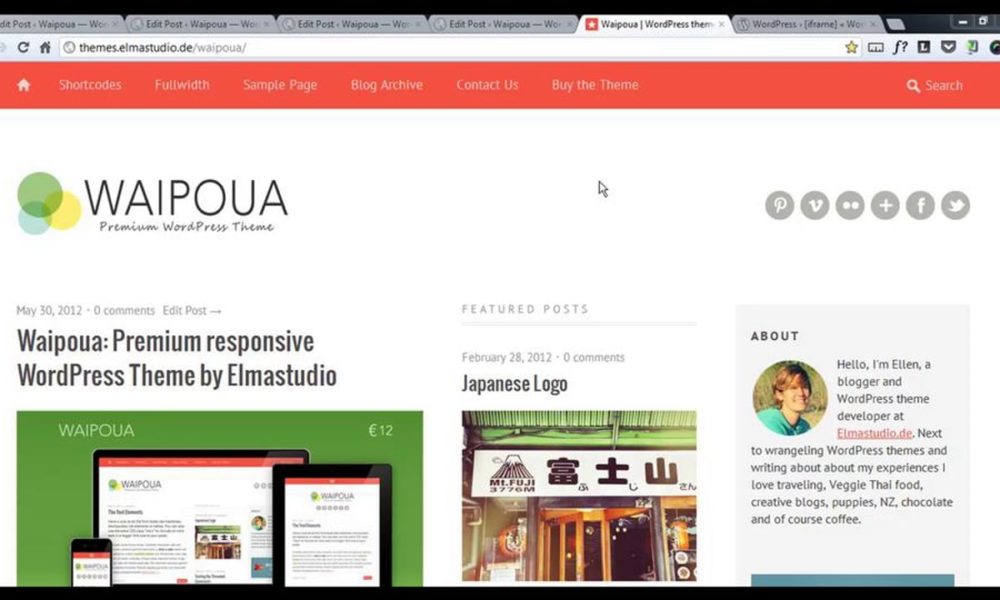
Waipoua Post Formats (en)
In the video tutorial you can see how you can use the WordPress post formats in the Waipoua theme.
Check out these cool WordPress plugins! – CodeRevolution. -
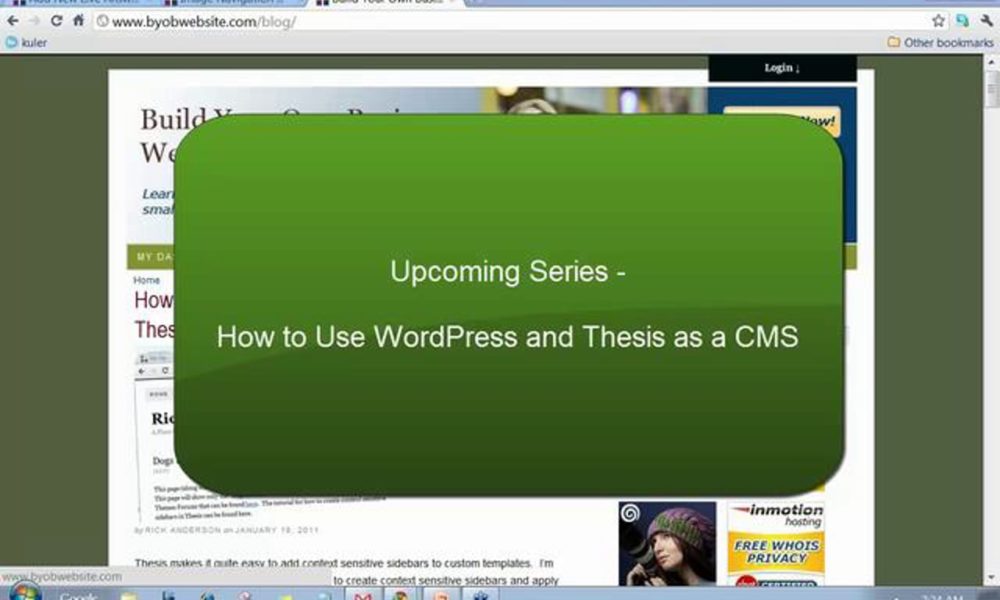
Thesis as a CMS – Upcoming Tutorial Series
A member asks about the content of the upcoming tutorial series that will be entitled something like “Use WordPress and Thesis as a Content Management System.” I discuss the general outline of new course that will be coming online this Spring. It will start out as a very basic “static” site and will develop into a membership site and community news site.
Check out these cool WordPress plugins! – CodeRevolution. -
Instalación de wordpress en un hosting profesional Curso de WordPress para Bloggers Principiantes
Curso de WordPress para Bloggers Principiantes. Lección 2: Instalación de WordPress para Bloggers Principiantes. Con este vídeo tutorial puedes instalar wordpress de manera fácil y rápida. Si quieres saber más visita mi blog: http://www.luisalfonsogomez.com
Check out these cool WordPress plugins! – CodeRevolution. -

Thesis Navigation Menu Part 12
Add Different Icons to Each Menu Itemhttp://thesistoolbox.com
Video Transcript
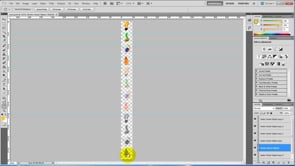
Now I’m going to show you how to use this plugin to style the Thesis navigation menu so that it has a you know, a little icon that sits before the text. And in fact, that icon is going to change color or change state as a link state changes. And we’re also going to use an image sprite to accomplish this rather than using a whole bunch of different images. So that’s the next thing that we’re going to do here. And in order for us to do that, the first thing we want to look at is our image itself.So this is our image that we’re going to use as our sprite. It has 4 different icons, the light bulb, the beaker, the planet, and the spaceship. And then it’s got 3 different states for each of those. It’s got the solid bright color. It’s got the semi-transparent color and it’s got the gray color. And the one I’m going to do is use this color for the current state, this for hover, and this for link so that the default color will be this gray color. And what we’ll be doing is we’ll be telling each menu item which piece of this image to use given its specific condition, using the position property inside of that plugin. And we will be setting the position from the top left hand corner. And so by specifying its height and its width, now each one of these icons sits in a rectangle that is 50 pixels by 50 pixels. So each of these 4, that’s 200 pixels and then 400 pixels and then 600 pixels. So this image is 600 pixels tall and 50 pixels wide. So we’ve got that little grid working here and it’s that little grid that we’re going to use for determining the position of the sprite in each of our menu items.
So the first thing we need to do is upload this menu and we’re going to come in here and go to the dashboard. Okay and then from the dashboard, we’ll go to the nav menu. Then this nav menu’s already sitting in the location here inside the Thesis Simple Header Widgets plugin. So when using this plugin with the Header Widgets plugin, of course, we’re going to set it so that it doesn’t display and then we’ll use the Header Widgets plugin to display it. So the position is set not to display, the menu visibility is set for everyone, the alignment is aligning the menu to the right, and at the moment, we’re not going to turn our layout guides on.
So in terms of our overall menu customization options, we are going to set overall menu margin in order to move this thing down. But I think otherwise, we’re going to not set anything else for our overall menu styles. And then for our typical menu styles, we will customize the typical item margin, typical item padding, typical item background. And then we are going to customize each menu item separately. The other thing I want to is just change up my text a little bit or we’re not going to do anything with submenus but change up my text. And so I’m going to use normal spacing for the text and when I remove all caps and then we’re going to say save to this. Okay now that will have created this progressive refinement whereby we have a new set of choices now that we’ve made these choices.
And let’s see, let’s just go over here and take a look at what it looks like now. Okay, there we go. So the first thing we’re going to do is go over to Design Options and get rid of the border around this thing. So we’ll go to Thesis Design Options and we’re going to go down to the nav menu and then we’ll get rid of the border. Remembering that the first thing we do is everything we can do using the Thesis Nav menu and then we refine that using the plugin. So we got rid of that border and if we refresh it, we’ll see that the border is gone.
Okay so now what we’re going to do is work on our typical menu item styles. And so the first place I think I want to give ourselves a left margin of 10 pixels. I want to separate those menu items themselves and I’m going to give the overall margin, a top margin say of 100 pixels. And then while we’re at it, in terms of background style, we are going to customize the background color and use the background image for each of these. Oh we haven’t… and we also need to set the number of tabs we’re going to do. We said we’re going to customize each menu item separately. We have 4 menu items so we’re going to say 4 menu tabs. And let’s see, customize background color… actually, in this case, we’re just going to customize background color and all of them but not use background image because this is the typical, not the menu item itself.
Okay so now we have tab 1, tab 2, tab 3, and tab 4 styles and then we have option to set colors. And what we’re going to do with the color is essentially, make these colors transparent. That’s why we said customize the background color because we want to get rid of all the background colors in the typical menu items because we’re not going to use any background color here. So we just make all those things transparent.
And then what we’re going to do is say to each of these tabs, we’re going to customize the background. Now, in order to understand these tabs, let’s go ahead and save it first. In order to understand how these tabs work, WordPress or Thesis automatically adds the class tab hyphen and then essentially tab number which is the position left to right in the menu. So this is tab-1, tab-2, tab-3, and tab-4. And so what we are doing here is we are doing the same thing. We’re creating a style for tab-1 and that style will apply to the first menu item.
Okay so now under our styles here, we are going to say use background image for the link background style, use background image for the hover style, use the background image and use the background image. And we have to make that choice again for all of these. You can see how many choices you would have to make if we didn’t have this progressive refinement system. You would have to wade through hundreds of irrelevant choices and it would just be confusing. So what we do instead is we progressively add choices as you make decisions.
Okay so anyway, we’re going to use background images on all of those states for each of those tabs. And now let’s go ahead and upload that image. We haven’t done that yet so we’re going to say add new. I’m just going to add this to our media library. Actually, we’re going to see our new drag and drop feature here in action because what I’m going to do is open this up, websites, BYOB Website, tutorial sites, and… I don’t know, Thesis BYOB tutorial graphics. And I believe I’m working with nav3.png. So all I do is just drag that here. Drag it, drop it, and now it’s been uploaded.
Okay and so let’s see, it says it’s uploaded so… okay, there it is. Now it is actually uploaded. So here’s our image here and so we’ll go ahead and copy that URL. Come back over to our plugin and then we’re going to just paste that URL everywhere. Let’s see, under tab 1 styles, we’ve got our link background image with no repeat and we’ll leave it at top left for the moment. And we’ll have our hover background image with no repeat and our current background image with no repeat and our current parent with no repeat. And then we’ll do the same thing with each of these because we’re not going to have these things repeat. It’s the icons that are only going to show up once.
Now you may wonder why we have to say this so many times but what I want you to have is some maximum flexibility. That is the ability to do different menu items in different states differently. So that’s what you have here. Once you’ve decided you want to style each tab differently, that’s what’s you’re going to have, a full set of choices for each tab. No repeat, current parent.
Okay so we’ve got that in there with the no repeat and if we hit save and hit refresh, we’re going to see those images show up. I think I must have messed that one up but you can see the light bulb and these ones here. Now what we need to do is add padding so that we can move the text away from the image. And of course, they’re all in the same position so they don’t change currently on link state yet but they will.
So come back over here and look at our tab 1 customization options, link background state. Yeah, you can see I forgot this one, no repeat. Okay, if we hit save and refresh it…
Check out these cool WordPress plugins! – CodeRevolution. -
Thesis Navigation Menu Plugin Part 12
Add Different Icons to Each Menu Item
http://thesistoolbox.com
Video Transcript
Now I’m going to show you how to use this plugin to style the Thesis navigation menu so that it has a you know, a little icon that sits before the text. And in fact, that icon is going to change color or change state as a link state changes. And we’re also going to use an image sprite to accomplish this rather than using a whole bunch of different images. So that’s the next thing that we’re going to do here. And in order for us to do that, the first thing we want to look at is our image itself.So this is our image that we’re going to use as our sprite. It has 4 different icons, the light bulb, the beaker, the planet, and the spaceship. And then it’s got 3 different states for each of those. It’s got the solid bright color. It’s got the semi-transparent color and it’s got the gray color. And the one I’m going to do is use this color for the current state, this for hover, and this for link so that the default color will be this gray color. And what we’ll be doing is we’ll be telling each menu item which piece of this image to use given its specific condition, using the position property inside of that plugin. And we will be setting the position from the top left hand corner. And so by specifying its height and its width, now each one of these icons sits in a rectangle that is 50 pixels by 50 pixels. So each of these 4, that’s 200 pixels and then 400 pixels and then 600 pixels. So this image is 600 pixels tall and 50 pixels wide. So we’ve got that little grid working here and it’s that little grid that we’re going to use for determining the position of the sprite in each of our menu items.
So the first thing we need to do is upload this menu and we’re going to come in here and go to the dashboard. Okay and then from the dashboard, we’ll go to the nav menu. Then this nav menu’s already sitting in the location here inside the Thesis Simple Header Widgets plugin. So when using this plugin with the Header Widgets plugin, of course, we’re going to set it so that it doesn’t display and then we’ll use the Header Widgets plugin to display it. So the position is set not to display, the menu visibility is set for everyone, the alignment is aligning the menu to the right, and at the moment, we’re not going to turn our layout guides on.
So in terms of our overall menu customization options, we are going to set overall menu margin in order to move this thing down. But I think otherwise, we’re going to not set anything else for our overall menu styles. And then for our typical menu styles, we will customize the typical item margin, typical item padding, typical item background. And then we are going to customize each menu item separately. The other thing I want to is just change up my text a little bit or we’re not going to do anything with submenus but change up my text. And so I’m going to use normal spacing for the text and when I remove all caps and then we’re going to say save to this. Okay now that will have created this progressive refinement whereby we have a new set of choices now that we’ve made these choices.
And let’s see, let’s just go over here and take a look at what it looks like now. Okay, there we go. So the first thing we’re going to do is go over to Design Options and get rid of the border around this thing. So we’ll go to Thesis Design Options and we’re going to go down to the nav menu and then we’ll get rid of the border. Remembering that the first thing we do is everything we can do using the Thesis Nav menu and then we refine that using the plugin. So we got rid of that border and if we refresh it, we’ll see that the border is gone.
Okay so now what we’re going to do is work on our typical menu item styles. And so the first place I think I want to give ourselves a left margin of 10 pixels. I want to separate those menu items themselves and I’m going to give the overall margin, a top margin say of 100 pixels. And then while we’re at it, in terms of background style, we are going to customize the background color and use the background image for each of these. Oh we haven’t… and we also need to set the number of tabs we’re going to do. We said we’re going to customize each menu item separately. We have 4 menu items so we’re going to say 4 menu tabs. And let’s see, customize background color… actually, in this case, we’re just going to customize background color and all of them but not use background image because this is the typical, not the menu item itself.
Okay so now we have tab 1, tab 2, tab 3, and tab 4 styles and then we have option to set colors. And what we’re going to do with the color is essentially, make these colors transparent. That’s why we said customize the background color because we want to get rid of all the background colors in the typical menu items because we’re not going to use any background color here. So we just make all those things transparent.
And then what we’re going to do is say to each of these tabs, we’re going to customize the background. Now, in order to understand these tabs, let’s go ahead and save it first. In order to understand how these tabs work, WordPress or Thesis automatically adds the class tab hyphen and then essentially tab number which is the position left to right in the menu. So this is tab-1, tab-2, tab-3, and tab-4. And so what we are doing here is we are doing the same thing. We’re creating a style for tab-1 and that style will apply to the first menu item.
Okay so now under our styles here, we are going to say use background image for the link background style, use background image for the hover style, use the background image and use the background image. And we have to make that choice again for all of these. You can see how many choices you would have to make if we didn’t have this progressive refinement system. You would have to wade through hundreds of irrelevant choices and it would just be confusing. So what we do instead is we progressively add choices as you make decisions.
Okay so anyway, we’re going to use background images on all of those states for each of those tabs. And now let’s go ahead and upload that image. We haven’t done that yet so we’re going to say add new. I’m just going to add this to our media library. Actually, we’re going to see our new drag and drop feature here in action because what I’m going to do is open this up, websites, BYOB Website, tutorial sites, and… I don’t know, Thesis BYOB tutorial graphics. And I believe I’m working with nav3.png. So all I do is just drag that here. Drag it, drop it, and now it’s been uploaded.
Okay and so let’s see, it says it’s uploaded so… okay, there it is. Now it is actually uploaded. So here’s our image here and so we’ll go ahead and copy that URL. Come back over to our plugin and then we’re going to just paste that URL everywhere. Let’s see, under tab 1 styles, we’ve got our link background image with no repeat and we’ll leave it at top left for the moment. And we’ll have our hover background image with no repeat and our current background image with no repeat and our current parent with no repeat. And then we’ll do the same thing with each of these because we’re not going to have these things repeat. It’s the icons that are only going to show up once.
Now you may wonder why we have to say this so many times but what I want you to have is some maximum flexibility. That is the ability to do different menu items in different states differently. So that’s what you have here. Once you’ve decided you want to style each tab differently, that’s what’s you’re going to have, a full set of choices for each tab. No repeat, current parent.
Okay so we’ve got that in there with the no repeat and if we hit save and hit refresh, we’re going to see those images show up. I think I must have messed that one up but you can see the light bulb and these ones here. Now what we need to do is add padding so that we can move the text away from the image. And of course, they’re all in the same position so they don’t change currently on link state yet but they will.
So come back over here and look at our tab 1 customization options, link background state. Yeah, you can see I forgot this one, no repeat. Okay, if we hit save and refresh it…
Check out these cool WordPress plugins! – CodeRevolution. -
Haben wir wirklich eine Wahl? Über Politik und Wettermanipulation / Bonn, Merl und Bölingen /12.03.2017
SRM, Geoengineering
Bonn, Merl und Bölingen, Deutschland
Diashow / Slideshow 12.03.2017
*
Weitere Infos:
http://blauerhimmel.info
http://www.chemtrail.de
http://www.geoengineeringwatch.org
http://chemtrailsplanet.net
*
http://www.geoengineeringwatch.org/geoengineering-watch-global-alert-news-march-18-2017-a/
http://www.geoengineeringwatch.org/why-high-bypass-turbofan-jet-engines-are-almost-incapable-of-producing-condensation-trails/
http://www.geoengineeringwatch.org/the-contrail-lie/
https://hessenwahrheit.wordpress.com/2016/10/03/kondensstreifen-oder-chemtrails/
http://www.geoengineeringwatch.org/geoengineering-definition-of-terms/
tutorial:
https://youtu.be/mRjmzy9XcaY
*
Einwanderung aus Sicht der Polizei | Rainer Wendt
https://www.youtube.com/watch?v=no-Fc931mUI
BRD Wahlsystem:
https://www.youtube.com/watch?v=krdRq-_m7Ho&feature=youtu.be
Andreas Popp Wahlen sind eine Lachnummer
https://www.youtube.com/watch?v=T2ML28bcQS4
Prof. Rainer Mausfeld: Die Angst der Machteliten vor dem Volk
“Wenn eine überschaubare Gruppe von Menschen dauerhaft über die große Masse Macht ausüben will, ist die Stabilität des Systems nur dann zu erreichen, wenn man die wichtigste Ressource kontrolliert. Wissen.”
https://youtu.be/Rk6I9gXwack
***
Aus der Videobeschreibung:Liebe Wanderfreunde!
Am Sonntag raus in die Natur! Frische Luft schnappen. Neue Kraft tanken. Die Sorgen und den Frust vergessen, der sich über die Woche angestaut hat:
– Ständige Meldungen über “Einzelfälle” bei Vergewaltigungen, Messerstechereien von Personen, deren Identität und Herkunft wohlweislich auf Befehl von “OBEN” verschwiegen wird. Wer sich dagegen auflehnt und die Wahrheit beim Namen nennt – wie der pensionierte Polizeigewerkschaftsvorsitzende “Rainer Wendt” – wird medial fertiggemacht.
(Grausame Realität – “Rainer Wendt” “Unzensiert” – Einwanderung aus Sicht der Polizei https://www.youtube.com/watch?v=no-Fc931mUI )– Lancierte Meldungen über (immer) psychisch gestörte Einzeltäter, die jetzt mit Äxten und Macheten rumrennen und Bio-Deutsche attackieren. Alles normal in diesem Land. “Weitergehen, hier gibt’s nichts zu sehen!”
– Wahlen, wo der Gewinner immer schon vor den ersten Hochrechnungen festzustehen scheint. Da wird nicht selten schon im voraus gratuliert. Und die Hochrechnungen bilden fast immer weitgehend punktgenau das amtliche Endergebnis ab. Hat Europa eine Wahl??? Hast DU wirklich eine Wahl??? Oder wählst Du nur die Farbe des Zauns, der Dich umgibt?
Dann doch lieber das alles hinter sich lassen und uns bewegen, damit wenigstens nicht die Gesundheit Schaden nimmt. Doch was ist das? Schon wieder so ein komischer, mit Barium, Strontium, Nano-Aluminium und wer weiß was alles angereicherter Himmel. Weiße künstliche Wolken. Man kann hochschauen wann man will: immer sieht man ein Flugzeug sprühen. Meistens in Nähe der Sonne, dessen Licht uns ja vorenthalten werden soll. So wird aus einem schönen Frühlingstag innerhalb von zwei bis drei Stunden ein Grau in Grau. Dieser Zustand hält dann wieder tagelang an. Man will uns ja weg haben, man will uns ja wichtiges Vitamin D3 vorenthalten. Man will ja Europa und hauptsächlich Deutschland umvolken. Nein, liebe Kritiker. Das alles kann man nicht mehr mit dem Si Ei E-Begriff “Verschwörungstheoretiker” abtun. Das kann man live und in Farbe schon im Stadtbild jeder größeren Stadt sehen. Schauen Sie nach Frankreich, Holland, Schweden!
Vielleicht machen wir ja nächste Woche eine Wanderung bei schönem tiefblauen Himmel?
Wann haben Sie den zuletzt gesehen? Glauben Sie an Zufälle?
Eine schöne Woche noch und danke fürs Zuschauen!
Check out these cool WordPress plugins! – CodeRevolution.